
How To Install Grommets and Eyelets in 5 Easy Steps
Hastypearl
I started laughing while downloading these images,
thinking about the teacher on
Ferris Bueller's Day Off.
Only instead it sounded like this...
Anyone? Anyone?
Who knows how to Install a Grommet or Eyelet?
:)
Actually, its kind of a fun thing to do,
and its almost always for a fun project when I do it!
Its really simple and will give you a nice finished look.
The only difference in the word Grommet and Eyelet,
is that an Eyelet is smaller.
Otherwise, they are both installed the same way.

* Eyelets come in two parts.
The top usually has a longer stem on it,
and the back, has a larger hole, and slips over the stem.
There are really only two things that can go wrong,
so it doesn't hurt to practice on a scrap, first.
One, you can accidentally reverse the two pieces,
and two, if you don't hold the eyelet tool straight,
it can make the front a little wonky.
Again, just practice and you'll be fine !

* These are the two tool pieces.
One is the anvil, and the other is a stem that you hit.
I'll show you what the pieces look like without paper or fabric first,
so it will be easier to see.
1. The first step is to cut a hole in your fabric or paper,
the same size as the openings of the eyelet.
I use a hole punch or one of my pointed razors.
Use scissors or even a pencil.

2. In the picture below, place the kit anvil on something flat.
I use a Vintage Anvil that I bought for $5 at an estate sale.
I couldn't be without it. I use it for all kinds of things.
If you don't have an anvil, you can use a rock, or your sidewalk.
Use your imagination.
3. Place the front piece face down on the kit anvil
and the long stem through the paper or fabric.

4. Then, place the back piece over that long stem.
It will look like the image below.
I did this WITHOUT my paper,
just so that you could see what it would look like.

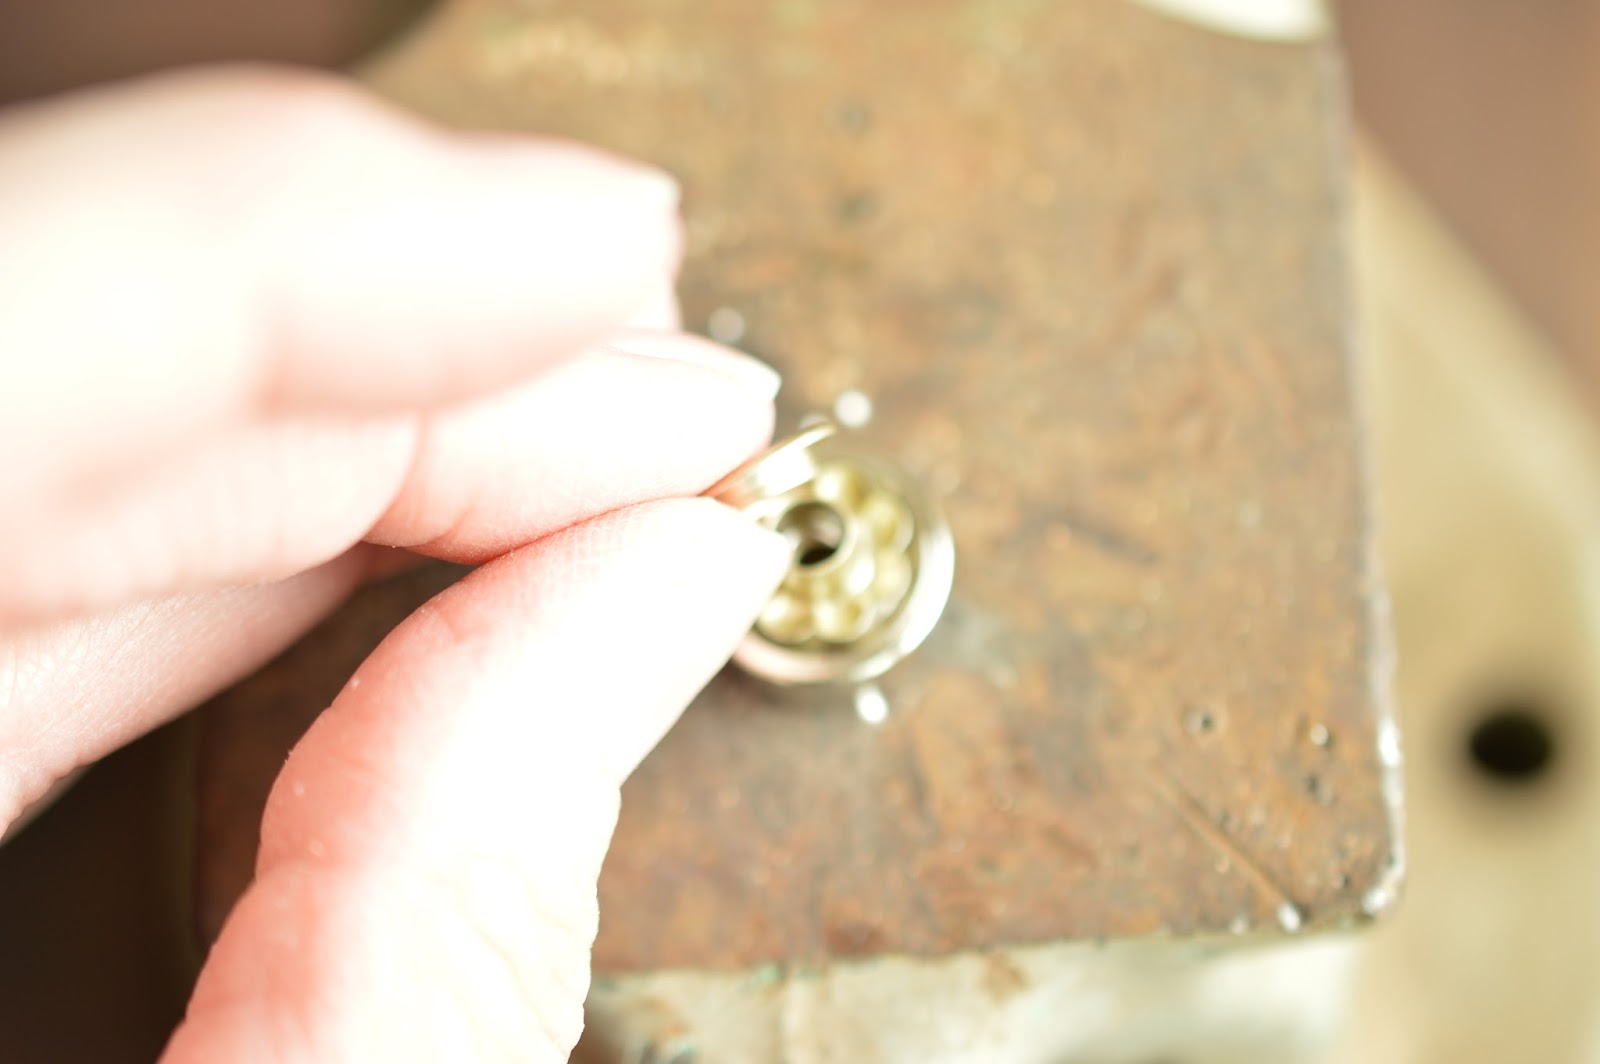
5. Then, you line up the tool stem, on top of the back piece,
and pound it lightly with your hammer.
It really only takes a few light taps.

If you did everything right, it will look like the image below
where I actually did the steps WITH the paper project.

So, this time WITH the project...
The image below, shows the long stem of the eyelet front
coming up through the art piece.
I then slipped the back piece, over the long stem.

This time, with the front piece pushed through the paper
in the image below, is ready to hammer.

Use the tool, to lightly tap the back piece onto the front piece.
Try to keep it straight up and down,
so that the front isn't flatter on one side than the other.

Flip it over, and it will look like the image below.
Sometimes, the anvil will still be attached,
but its really easy to unstick.

*

This is what it will look like on the back.
No more raggedy or frayed edges.
Depending on what size Grommets or Eyelets you get,
you can use them for belt making,
shower curtains, cafe curtains, tote bags,
pillows, bookmaking and like I have done here,
for hanging Mixed Media Projects.
There are also other tools for installing Grommets and Eyelets,
like the Cropadile.
I like these little inexpensive kits, better.
When you run out of Eyelets,
you can just buy replacements.
You can find them at art box stores,
and fabric stores in the notions department.

So, Ferris,
if you had known that you were going to learn how to install an Eyelet,
you might have gone to school that day that you missed :)
For those of you that haven't done this before,
I hope this helps and that you try it very soon!
If you do, let me see what you made, OK?
Anyone? Anyone? :)
I've been listing new items at Etsy Hastypearl.
I hope that you will pop over and see whats new.
Its not too early, to be thinking about your Holiday shopping :)
Avoid the rush!
I'll send your purchase right to your door.
For Multiple purchases, I will combine your shipping.
It Always saves you money to buy multiples at one place.
Often, additional pieces will ship either free or almost free.
I always refund any overages right back to you.
Enjoy these wonderful days!
:) Laura aka hastypearl
No comments:
Post a Comment